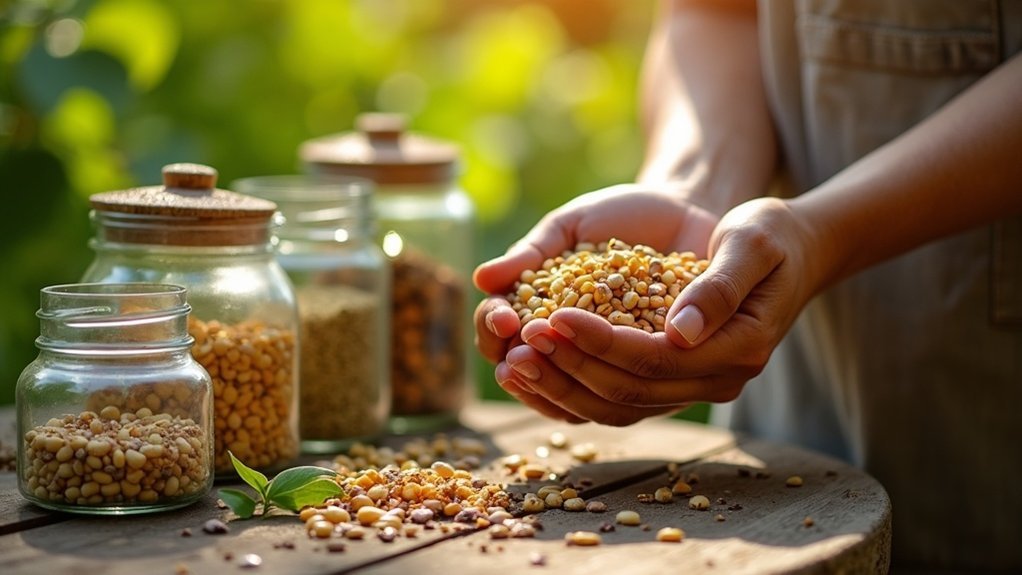
To collect seeds effectively for survival and prepping purposes, focus on heirloom or open-pollinated varieties that can thrive in your specific climate. Harvest seeds when fruits are mature but not overripe to ensure maximum viability. Utilize tools like scissors for efficient harvesting, and make sure to label your containers clearly to maintain organization.
Once harvested, clean the seeds by soaking them or allowing them to dry thoroughly. Afterward, spread them out in a cool, dark place to ensure they dry completely. For long-term storage, keep seeds in airtight containers at temperatures between 32°F to 50°F. Label each packet with essential information such as the variety, harvest date, and any specific growing instructions. Regularly check your stored seeds for moisture and pests to maintain their viability.
Understanding these processes is crucial for ensuring a reliable food source in times of need, and connecting with a community of fellow preppers can provide additional insights into effective seed preservation strategies.
Key Takeaways
- Choose open-pollinated and heirloom varieties for seed saving to ensure reliable food sources during emergencies.
- Harvest seeds from mature fruits or flowers, ideally on dry days, to reduce the risk of spoilage and ensure readiness for survival situations.
- Clean seeds by soaking fleshy ones and thoroughly drying them before storage to maintain their viability for future planting.
- Store seeds in airtight containers in a cool, dark, and dry environment to maximize their shelf life and reliability in times of need.
- Clearly label containers with species, variety, and collection date for easy identification and tracking, ensuring you know what resources you have in your survival stockpile.
Why Save Seeds?
Saving seeds is a vital practice for anyone interested in survivalism and prepping, as it enhances self-sufficiency and sustainability in food production.
By saving seeds from heirloom varieties, you can preserve unique plant characteristics that may be essential during times of crisis, while also contributing to biodiversity. This practice diminishes your reliance on commercial seed sources, leading to substantial cost savings in future gardening endeavors.
Engaging in seed saving not only strengthens your connection to nature but also encourages community solidarity through local seed exchanges and libraries.
Sharing seeds and knowledge with fellow preppers fosters a resilient gardening culture that benefits all involved. Embrace seed saving to ensure a more self-reliant and diverse food supply in uncertain times.
Choosing the Right Plants for Seed Saving
When it comes to establishing a sustainable seed-saving practice for survival and prepping, selecting the right plants is crucial to ensuring reliable harvests in the future.
Establishing a sustainable seed-saving practice is essential for ensuring future reliable harvests in survival and prepping.
Focus on heirloom seeds and stable, open-pollinated varieties that will retain their traits across generations. Avoid F1 hybrids, as they can lead to unpredictable outcomes, which may not be ideal in survival situations.
Consider the plant lifecycle and pollination methods to prevent cross-pollination:
- Choose plants with stable traits that are resilient and adaptable.
- Prioritize open-pollinated varieties for consistent seed production, essential for long-term food security.
- Safeguard seed purity by isolating plants if necessary, to maintain genetic integrity.
- Research reputable sources for heirloom seeds that are known for their hardiness and reliability.
This careful selection process will significantly bolster your seed-saving efforts and enhance your preparedness for future challenges.
Harvesting Seeds at the Right Time
To ensure the highest viability of your seeds for survival and prepping purposes, timing is crucial during the harvesting process. Harvest seeds when the fruits or flowers begin to dry and mature, indicating they’re fully ripe.
For vegetables and fruits, collect seeds just as they start to over-ripen, as this ensures they’re at their peak potential. Always choose dry days for harvesting seeds to avoid moisture-related rotting, which can jeopardize seed viability—a critical factor in self-sufficiency.
Keep a close eye on seed heads; those that disperse easily should be collected just before they reach full ripeness. Remember that different crops have specific maturity indicators, such as brown, dry pods for beans or brown husks for corn, which are essential for successful survival gardening.
Techniques for Collecting Different Types of Seeds
When collecting seeds for survival and prepping, it’s crucial to understand the timing and methods specific to each type.
For example, vegetable seeds should be harvested from fully mature plants to ensure viability, while flower and herb seeds are best gathered on dry days to prevent mold and spoilage.
Equip yourself with the right tools, such as seed envelopes and a sturdy pair of scissors, to guarantee an efficient and successful seed collection process.
This knowledge will enhance your self-sufficiency and preparedness for any situation.
Timing for Seed Collection
Timing for seed collection is crucial for ensuring the viability of your seeds, especially in the context of survivalism and prepping. Properly harvested seeds can provide a sustainable food source in challenging times.
Here are some essential tips for collecting seeds effectively:
- Collect seeds from fully mature fruits or seed pods, making sure they’re dry and ready for harvest. This ensures that they’ll germinate successfully when needed.
- Monitor the ripeness of your crops closely to optimize your collection.
- Harvest on dry days to prevent damage to the seeds and ensure they remain viable.
- For beans and peas, wait until the pods are brown and brittle, indicating they’re ready for collection.
- For tomatoes and peppers, seeds are ready when the fruits are fully ripe, ensuring maximum viability.
- Gather seeds just before they disperse naturally to maintain their viability for future planting.
To keep your survival seed stock organized, use labeled containers to store your seeds.
Be sure to note the collection date and cultivar for easy reference, so you can manage your resources effectively during emergencies.
Methods for Different Seeds
Collecting seeds is a crucial skill for survivalists and preppers, as it ensures you have a reliable source of food in challenging times. Different plants require specific techniques to maximize seed viability and quality.
For tomato seeds, always select fully ripe fruits and ferment the seeds to remove the gel coating, which can hinder germination. When it comes to beans, wait until the pods are dry and rattle, indicating they’re at peak maturity for optimal storage.
Cucumber and melon seeds also benefit from a fermentation process, enhancing their longevity. Okra seeds should be harvested from dried pods and carefully dried to maintain their quality for future planting.
For pumpkin and squash seeds, collect them from mature fruits, clean thoroughly, and dry well to prevent rot during storage. Avoid using immature seeds, as they can lead to poor yields when you need them most.
Being well-prepared with your seed collection can greatly enhance your self-sufficiency in a survival situation.
Tools for Harvesting Seeds
Successfully gathering seeds for survival and prepping requires the right tools and techniques tailored to the type of seed you’re working with.
To effectively collect and preserve viable seeds for future use, keep these essentials in mind:
- Labeled plastic or paper bags for easy organization and inventory tracking
- Scissors or clippers for careful removal of seed heads, minimizing damage
- A blender for extracting seeds from fleshy fruits, ensuring maximum yield
- A cool, dark place to allow the seeds to dry, preventing spoilage
Monitor the ripeness of seed heads closely to ensure you’re harvesting at the right time, and guarantee thorough drying for optimal long-term storage.
Proper handling will help maintain the viability of your seeds and prevent moisture-related issues, crucial for self-sufficiency in survival situations.
Cleaning and Drying Seeds
Cleaning and drying seeds is crucial for preserving their viability and ensuring successful germination, especially for those focused on survivalism and prepping.
Some seeds require minimal cleaning, while others, particularly those from fleshy fruits, need thorough cleaning by soaking in water to separate them from the pulp. Use screens, tea strainers, or colanders to effectively clean seeds and remove debris.
Some seeds need only minimal cleaning, while those from fleshy fruits benefit from soaking to remove pulp effectively.
When dealing with dry fruits, collect seeds only when they’re fully mature and dry, as this is essential for long-term storage. Spread seeds on newspapers or cardboard in a cool, dark place for one to three weeks, ensuring they’re completely dry to prevent rotting.
For optimal storage, keep cleaned and dried seeds in envelopes or paper bags sealed in airtight containers, making them ready for future planting in your survival garden.
Storing Seeds Properly
To store seeds properly for survival and prepping purposes, it’s essential to focus on ideal conditions, effective labeling techniques, and reliable germination testing methods.
Ensure your seeds are kept in a cool, dry place, ideally in airtight containers to protect them from moisture and pests.
Clearly label each container with the plant name and collection date for easy identification and rotation.
Before planting, always conduct a germination test to confirm your seeds are viable, ensuring a successful harvest in times of need.
This preparation is crucial for maintaining a self-sufficient food supply during challenging times.
Ideal Storage Conditions
While maintaining seed viability is crucial for successful survival gardening, understanding the ideal storage conditions can significantly enhance the longevity of your seeds. Aim for a cool, dark, and dry environment, ideally between 32°F and 50°F, with low humidity levels to ensure your seeds remain viable for long-term use.
Store seeds in airtight containers such as plastic buckets or mason jars to prevent moisture damage.
- Keep seeds away from direct sunlight to avoid degradation.
- Ensure that the combined temperature and humidity level remains below 100% to protect seed integrity.
- Label seed packets with essential details such as species, variety, and collection year for easy identification during emergencies.
- For long-term preservation, consider freezing seeds, ensuring they’re thoroughly dry to prevent ice crystal formation.
Proper Labeling Techniques
Proper labeling techniques are essential for maintaining an organized seed collection, especially for survivalists and preppers who rely on self-sufficiency. By ensuring easy access to crucial information about each variety, you can enhance your preparedness for any situation.
Always label seed containers with the plant name, variety, and collection date to effectively track seed viability, which is vital for long-term food security. Use waterproof markers to prevent fading, and consider adding notes on growth habits, care instructions, and potential uses in survival scenarios.
Store seeds in airtight containers, such as glass jars or plastic bags, and include details on ideal storage conditions on each label to protect against environmental factors. Regularly check for moisture or pests, updating labels as necessary to preserve seed quality and ensure successful planting when the need arises.
Germination Testing Methods
Germination testing is a crucial process for prepping and survivalism, ensuring that your stored seeds will be viable when needed for planting.
To effectively carry out germination testing, follow these essential steps:
- Moisten paper towels and arrange 25-50 seeds in rows. This method allows you to monitor multiple seeds at once, ensuring a diverse crop.
- Roll or fold the towels and place them in a warm environment (ideally between 70-80°F) to mimic optimal growing conditions.
- Check and count the germinated seeds every 2-3 days, diligently recording your results. This practice not only helps you track viability but also builds your skills in seed management.
- Finally, calculate the germination percentage to assess the overall health of your seed stock. This information is vital for planning your future gardening and food supply strategies.
Ensuring Seed Viability
To ensure seed viability for your survival garden, it’s crucial to recognize that factors like temperature and humidity significantly influence how long seeds remain usable.
Store seeds in a cool environment (35-45°F) with low humidity to prolong their lifespan, which is vital for prepping scenarios. Properly cleaning and thoroughly drying seeds before storage helps prevent moisture-related issues such as rot or mold, which could compromise your food supply.
Use airtight containers, ideally glass jars or plastic buckets, to maintain dryness and protect against pests that could invade your stockpile. Additionally, label each packet with the species, variety name, and collection date to easily track viability as you prepare for self-sufficiency.
Consider conducting a germination test to confirm that your seeds are still viable before planting them in your survival garden.
Engaging With the Gardening Community
Engaging with the survivalism and prepping community can significantly enhance your skills and knowledge in self-sufficiency and emergency preparedness.
Engaging with the prepping community boosts your self-sufficiency skills and enhances emergency preparedness knowledge.
By participating in local and online prepping groups, you’ll foster resilience and connect with fellow enthusiasts.
Consider these valuable resources:
- Join community workshops to learn essential survival skills.
- Participate in local prepper meetups and training events.
- Connect through social media platforms like Facebook and Instagram to share tips and strategies.
- Become a member of prepping forums for access to expert advice and resources.
These activities not only promote sustainable living practices but also deepen your understanding of emergency preparedness techniques.
Embrace these opportunities to learn from others and share your own experiences.