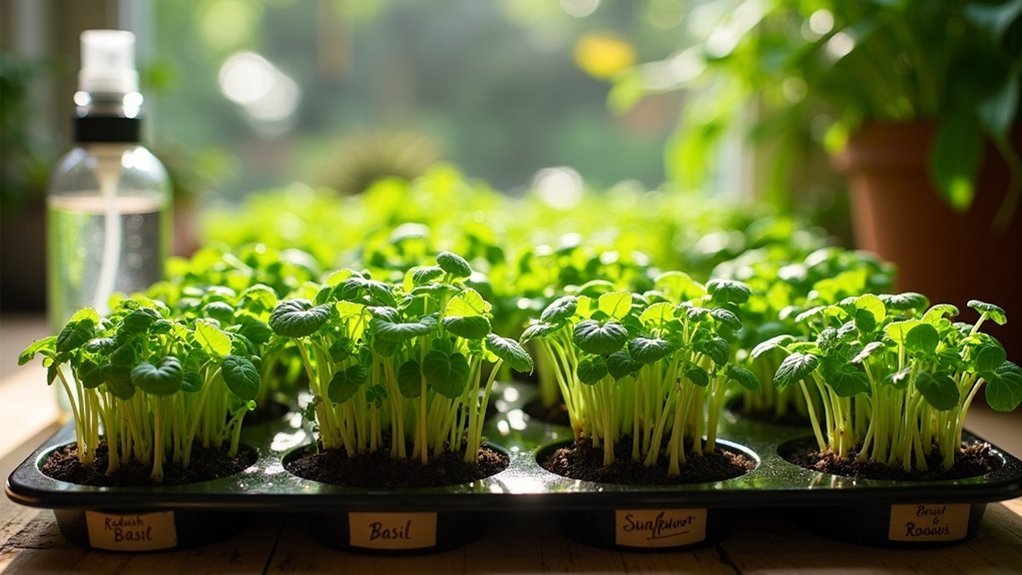
To grow microgreens indoors for nutrition in a survival or prepping context, start by selecting high-quality seeds that are easy to grow and nutrient-dense. Use shallow trays with drainage holes filled with a high-quality potting soil or a soil-less mix to ensure proper drainage. Position the trays in a well-lit area, aiming for 12-16 hours of light daily, which may require supplemental grow lights if natural light is insufficient.
Maintain a stable temperature between 60°F to 75°F to encourage healthy growth, and mist the soil regularly to keep it moist but not overly saturated. Microgreens are typically ready to harvest when they reach 1 to 3 inches in height, ideally just before the second set of leaves appears, as this is when they offer the best flavor and nutrition. Growing your own microgreens can be a vital skill in a prepping lifestyle, providing fresh greens year-round while enhancing your self-sufficiency. Discover more tips and techniques to optimize your microgreen cultivation for survival.
Key Takeaways
- Select high-quality seeds and a nutrient-rich potting mix to maximize growth and nutrient density in your microgreens, which can be a valuable food source during emergencies.
- Ensure your microgreens receive 12-16 hours of light daily, utilizing grow lights or positioning them in a south-facing window to promote robust growth, especially in indoor conditions where natural light may be limited.
- Keep the temperature stable between 60°F to 75°F and ensure proper air circulation to prevent mold, which is crucial for maintaining healthy plants that can sustain you in a survival situation.
- Water your microgreens regularly, employing gentle misting or bottom watering techniques to keep the soil uniformly moist without oversaturation, essential for their survival and your nourishment.
- Harvest microgreens at a height of 1 to 3 inches, before the second set of leaves appears, to ensure you get the best flavor and nutrient content, making them a potent addition to your emergency food supply.
Understanding Microgreens and Their Benefits
Microgreens, while small, are an invaluable resource for survivalists and preppers looking to boost their nutritional intake.
These young edible plants are harvested shortly after their first leaves develop and can contain up to 40 times more essential nutrients than mature vegetables. Their nutrient density provides concentrated vitamins and minerals that can enhance your diet efficiently, especially in emergency situations where food variety may be limited.
One of the greatest advantages of microgreens is their ability to be grown indoors year-round, ensuring you have a reliable source of fresh greens regardless of external conditions or supply chain disruptions.
Varieties such as arugula, basil, and broccoli aren’t only easy to cultivate but also have rapid harvest times ranging from just 5 to 21 days, making them an ideal choice for home gardening in a prepping context.
Incorporating microgreens into your food storage and self-sufficiency plans can significantly enhance your nutritional resilience.
Essential Supplies for Growing Microgreens Indoors
To successfully grow microgreens indoors as part of your survival and prepping strategy, it’s essential to gather specific supplies that facilitate their growth and ensure a bountiful yield.
Start with shallow trays featuring drainage holes to prevent waterlogging and promote healthy root development. Use high-quality potting soil or seed starting mix for optimal moisture retention; avoid garden soil to keep pests and diseases at bay.
Select microgreen seeds from reputable suppliers to ensure quality and viability in case of emergencies. Adequate lighting is crucial, so consider investing in grow lights with a color temperature around 6,500 Kelvins, providing 12-16 hours of light daily to support growth.
Lastly, maintain soil moisture through regular checks and gentle misting or bottom watering to encourage robust growth, ensuring you have a reliable source of fresh greens when needed.
Choosing the Right Location for Your Microgreens
To successfully grow microgreens in a survivalist setting, it’s essential to select a location that meets their specific light and temperature requirements while also considering your overall preparedness strategy.
Aim for an area that provides 12-16 hours of light daily—ideally from a south-facing window or artificial grow lights that can be powered by a generator or solar setup.
Maintaining stable temperatures is crucial for promoting healthy growth, especially in fluctuating environmental conditions.
Additionally, ensure there’s ample space for your microgreens setup and easy access to water for regular care, which is vital for sustaining your food supply during emergencies.
Light Requirements for Growth
When selecting the right location for your microgreens, it’s essential to ensure they receive adequate light, as they thrive on 12-16 hours of daily exposure.
In a survivalist context, if natural sunlight is insufficient—especially in a strategic shelter or off-grid setting—consider using artificial lights such as full-spectrum LED grow lights.
Position these lights 5-7 inches above your microgreens to provide the ideal light intensity, aiming for at least 2,000 lumens and a color temperature of around 6,500 Kelvins to simulate natural daylight.
Additionally, rotating your trays every few days will guarantee even light exposure, preventing your microgreens from leaning toward the light source and promoting robust, healthy growth.
This practice not only enhances your food supply but also supports self-sufficiency in challenging situations.
Ideal Temperature Conditions
Microgreens can be a valuable addition to your survival garden, providing essential nutrients in a compact space. They thrive best in temperatures ranging from 60°F to 75°F (15°C to 24°C), making it essential to establish the right environment for optimal growth.
Here are some survivalist-friendly tips to maintain ideal temperature conditions for your microgreens:
- Steer clear of drafty areas or heating vents to avoid temperature fluctuations that can hinder growth.
- Utilize a seedling heat mat to ensure consistent soil warmth, especially during colder months when heating is necessary.
- Ensure adequate lighting; position grow lights 5-7 inches away and maintain a schedule of 14-16 hours of light daily to promote healthy growth.
- Keep an eye on humidity levels, as microgreens thrive in a humid environment, which can be crucial in a survival situation.
- Mist regularly to maintain soil moisture without the risk of overwatering, ensuring your microgreens remain healthy and ready for harvest.
Incorporating microgreens into your prepping plan can provide fresh, nutritious food options even in challenging circumstances.
Space Considerations for Setup
Choosing the right location for your microgreens is crucial, especially in a survival or prepping context, as it can significantly affect their growth and health. Select a space that receives 12-16 hours of light daily, maintains a stable temperature between 65°F to 75°F, and has good air circulation to prevent mold—essential for ensuring a reliable food source. A countertop, windowsill, or dedicated shelf can work well for easy daily care, allowing you to monitor your crops closely. Ensure your setup accommodates trays and light sources without overcrowding, as an organized space promotes efficiency and readiness in your prep plan.
| Consideration | Details |
|---|---|
| Light | 12-16 hours daily |
| Temperature | 65°F – 75°F |
| Air Circulation | Prevent mold and mildew |
| Accessibility | Easy access for daily care |
| Space | Sufficient for trays and lights |
Step-by-Step Guide to Planting Microgreens
To successfully plant microgreens for your survival garden, start by filling a shallow tray with about two inches of high-quality seed starting mix or organic potting soil. Ensure the soil is moistened but not soaking wet, as maintaining the right moisture level is crucial for growth.
Start your survival garden by using high-quality soil in a shallow tray, ensuring proper moisture for thriving microgreens.
- Evenly broadcast seeds over the surface to maximize yield.
- Lightly press seeds into the soil to ensure good seed-to-soil contact.
- Cover with a thin layer of soil if needed, providing a protective barrier.
- Mist gently to maintain moisture without over-saturating.
- Place in a well-lit area, rotating the tray for even exposure to sunlight.
Keep the soil consistently damp until your microgreens are ready to harvest in about 7 to 14 days, typically reaching heights of 1 to 3 inches.
These nutritious homegrown greens can be a valuable addition to your food supply, enhancing your self-sufficiency during uncertain times. Enjoy the benefits of fresh microgreens right from your own garden!
Caring for Your Microgreens: Watering and Light Requirements
To ensure your microgreens can support your survival and prepping efforts, consistent watering and proper light exposure are vital.
Mist the soil daily to maintain a damp environment without oversaturating, while providing 12-16 hours of light—either from sunlight or grow lights.
Regularly check soil moisture and rotate your trays to promote even growth and healthy leaves, ensuring a reliable source of nutrition in any situation.
Watering Techniques
While ensuring your microgreens receive adequate light is crucial for their growth, proper watering techniques are equally essential for their health, especially in a survival or prepping scenario where resources may be limited.
To maintain consistent moisture for your microgreens, follow these guidelines:
- Water daily, particularly during germination, to ensure strong growth.
- Use a spray bottle for gentle misting, which conserves water and prevents over-saturation.
- Employ bottom watering to avoid displacing seeds, allowing for more efficient water absorption.
- Check soil moisture by feeling the top inch; if it’s dry, it’s time to water, ensuring your plants don’t suffer in a resource-scarce environment.
- Combine watering with 12-16 hours of adequate light exposure to promote healthy growth.
Light Duration
Watering techniques are crucial for nurturing your microgreens, but their growth also relies heavily on sufficient light exposure, especially in a survivalist setting where every resource counts.
Aim for 12 to 16 hours of light duration daily, using natural sunlight whenever possible or grow lights if necessary. Position these lights 5 to 7 inches above your microgreens to ensure optimal light intensity without the risk of overheating.
Automating your lighting schedule with outlet timers can help maintain consistency, which is vital for healthy growth, particularly when you’re relying on these crops for sustenance. Insufficient light can lead to leggy plants and compromised flavor, which isn’t ideal for any prepper.
For effective photosynthesis, target a light intensity of 2,000 lumens and a color temperature of around 6,500 Kelvins to ensure your microgreens thrive in any situation.
Monitoring Soil Moisture
Monitoring soil moisture is crucial for anyone invested in survivalism and prepping, particularly when growing microgreens as a reliable food source. These plants flourish in damp but not overly wet conditions. Here are essential points to consider:
- Regularly check the soil moisture level; it should feel sponge-damp to the touch, indicating it’s neither too dry nor waterlogged.
- Mist the surface lightly during the initial growth phase to maintain moisture without oversaturating the soil.
- Utilize bottom watering techniques to avoid displacing seeds while ensuring they absorb moisture effectively.
- Ensure your microgreens receive adequate light for 12 to 16 hours a day to optimize moisture utilization and growth.
- Rotate your trays periodically to promote even moisture distribution, especially if you’re using artificial lighting, which can create hotspots.
Incorporating these practices not only enhances your microgreens’ growth but also strengthens your self-sufficiency in a preparedness scenario.
Harvesting Microgreens: Timing and Techniques
When you’re ready to harvest your microgreens, timing is crucial for ensuring optimal flavor and nutrition, especially in a survival situation where every resource counts.
Typically, microgreens are ready for harvest in 7 to 14 days, growing to a height of 1 to 3 inches with vibrant green cotyledons. Use clean scissors to cut just above the soil line, minimizing damage to the plant and maximizing yield.
Microgreens can be harvested in just 7 to 14 days for peak flavor and nutrition.
It’s essential to harvest before the second set of leaves appears, as this is when the flavor and nutrient density are at their peak.
To ensure a steady food supply, stagger your sowing by planting new seeds every 14 days. This strategy will enable you to have fresh crops ready for harvest at regular intervals, providing a valuable food source in any preparedness plan.
Storing Microgreens for Maximum Freshness
To ensure your microgreens remain fresh for as long as possible, especially in a survival or prepping scenario, it’s crucial to implement effective storage strategies right after harvesting.
Here are some tips tailored for optimal microgreen storage:
- Utilize a sealed container lined with a damp paper towel to help retain moisture, which is vital in preserving freshness.
- Avoid washing microgreens until just before you plan to eat them; this prevents premature spoilage and extends their shelf life.
- Opt for perforated containers to promote airflow while keeping your microgreens crisp and reducing the risk of mold.
- Keep the refrigerator temperature between 34-40°F (1-4°C) for ideal storage conditions, ensuring your microgreens stay vibrant and nutritious.
- Regularly inspect your microgreens for any signs of decay, as proactive monitoring can help you maximize their shelf life of 10 to 12 days, which is especially important when preparing for long-term food storage needs.
Incorporating Microgreens Into Your Diet
After ensuring your microgreens are stored properly for maximum freshness, it’s time to contemplate how to incorporate them into your survival diet effectively.
These nutrient-packed greens can enhance your meals, whether you’re enjoying a simple salad or a hearty sandwich, providing essential nutrition without adding unnecessary calories.
Nutrient-dense microgreens elevate any meal, offering vital nutrition without the extra calories.
Consider mixing various organic microgreens like arugula, broccoli, and radish to benefit from a diverse range of vitamins, minerals, and antioxidants that can bolster your health during tough times.
A small handful of microgreens can deliver the same nutrients as a large bowl of traditional salad greens, making them an ideal addition to your emergency food supplies.
By cultivating microgreens in your kitchen garden, you can ensure a fresh source of nutrition that supports your health without relying on store-bought supplements.
Embrace the benefits of microgreens for a resilient diet!